Pages

Showing posts with label Stampin Up 3D items. Show all posts

Wednesday, 12 February 2014

Stampin' Up! Sweet Sorbet meets Kraft Box

Can I just start by saying 'Yay!', the builders came today and fitted the last two pieces of glass to our conservatoire roof! Only taken them 6 months but am I glad it's finally done. I can't believe we can actually start to decorate, lay flooring and turn it into a playroom for Zac and Blake.

So whilst the builders were busy fitting glass I got busy spilling glitter and whoa did I spill it good!  Let me show you what happened when our Sweet Sorbet Designer Papers met a Kraft Box.

Stampin_Up

Do you like? It's one of our Kraft Boxes decorated with the Sale-A-Bration designer papers Sweet Sorbet, aren't the colours so pretty? I wanted to make a flower and put to use the Crepe Filter Paper from the Stampin' Up! main catalogue. I thought it would be cheating to use the pre-cut round pieces so cut strips, punched the edges and daubed them with ink using a Finger Dauber before pleating together. Then the mess started.

I thought it would make it look even more pretty to add glitter to the edges, so I carefully applied Tombow then ever so gently scattered on my gold glitter. Then I sneezed. Then the whole tub of glitter fell on the floor (glad for laminate). I retrieved what I could and the rest went to the Dyson. Would love to do that at a hostess' house!

Back to the project, I popped the flower onto a Tea Lace paper Doily - covered it with Versamark ink first and then used Gold Embossing Powder (made sure I didn't spill that).

Stampin_Up

Other bits and pieces I've used; our gorgeous Gold Glimmer Paper, Subtles Button, Gold Linen Thread (thank you Stampin' Up!), Foil Embossed Vellum and the cute little Petite Petals Punch.

Here are some flower close ups:

Stampin_Up

 My disaster.....


If you'd like to know more about how you can get Sale-a-Bration products for FREE, please just click HERE or you can go direct to my online shop HERE.

Hugs
Victoria
xxx
Pin It

Thursday, 9 January 2014

Stampin' Up! catching Up!

Aaargh - where did December go? And then the start of January? Waaay too busy for my liking plus lots of none crafty stuff going on but now I'm back. And I'm starting the new year with a Christmas project, I know you're probably fed up of them by now and are well over Christmas but I have to share with you the teacher gifts I made for Zac and Blake to give to their teachers - they could so easily be adapted to not be Christmas!!

Stampin_Up

I made some paper coffee cups filled with treats and there is a reason I still want to share them with you and that's to play spot the soon to be released NEW products from Stampin' Up! ha ha ha I'm such a tease!

I got the red cups from a local 'everything' shop. They're great as they came with the sipper cup lids too and the shade of red was just perfect. I filled them with Lindor truffles, coffee and hot chocolate sachets. An idea put in my head from my teamie Louise as she made me some lovely slate stamped coffee mats with a fab mug filled with goodies too.

The stamp sets I used are Perfect Blend and Be Very Merry. I mixed them up with the Season of Style Designer Papers and then added lots of new products. I'll give you a clue - gold is the new black!!! Here are a few close ups:

Stampin_Up_UK

And one of the cups on their own. I am so going to make some Valentine versions of these next!

Join_Stampin_Up

Righto, promise to be back in the land of blogging from now on.

Hugs
Victoria
xxx
Pin It

Sunday, 15 September 2013

Stampin' Up! Build A Banner

Ooh I'm having a proper lazy Sunday with my hubby and boys after a fun but hectic day at Stampin' Up! training yesterday. I'll post about that tomorrow. For today I'm feeling like sharing a really fun and inky project I made using the Stampin' Up! Build A Banner Simply Created Kit.

Starting with a close up:

Stampin_Up

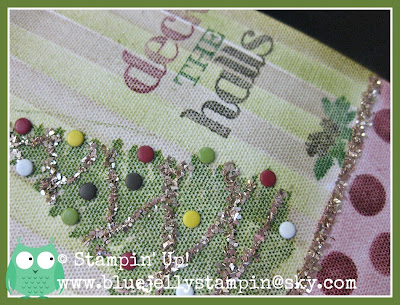
Last year I wasn't really feeling the love for Stampin' Up! Glass Glitter - but this year I can't get enough of the stuff! Isn't it funny how your tastes change? Glad it's still available and in tow shades too - this is Champagne. I've used it to decorate my tree along with Candy Dots.

Here's the full project:

Stampin_Up

I made a gift bag using two of the canvas pennants from the kit. You get 18 in total so plenty for lots of projects. I stuck them together using Tombow and then decorated with the stencils in the kits using Finger Daubers with Old Olive, Cherry Cobbler and Crumb Cake inks. The Glass Glitter is held in place with Tombow too - such an amazing glue. I had this on display at our training event yesterday and it got plenty of 'oohs' and 'aahs' so much so that I will be advertising a class using the banner kit very soon!

Hugs
Pin It

Thursday, 18 April 2013

Stampin' Up! Soda Pop Tops

Ooh it's soooo windy here in the UK - we're not used to adverse weather, snow, wind, ice etc. We need to toughen up a bit don't we?

So today's project features the new Stampin' Up! Soda Pop Tops. My friend Teresa inspired me to make these by forcing me to buy the notepads to decorate. Only kidding - she didn't really, she merely suggested it and five notebooks fell into my basket!

Stampin_Up_Demonstrator

I've decorated them to match the sticky note book covers I made last week. Using Crumb Cake, Pretty in Pink, Pool Party and Wisteria Wonder Card

I've added a strip of Crumb Cake Designer Paper to the spine and then the rest of the decoration mirrors the sticky note books. The sentiment is from Creatively Yours and the crown from A Fitting Occasion.

Stampin_Up

With the addition of a Soda Pop Top. This is one of the smaller ones, I popped it through the Big Shot to flatten it and then punched a circle of DSP with the circle punch from Itty Bitty Punches and then popped a Self Adhesive Pearl in the middle. Ooh real stitching - check me out!

Join_Stampin_Up

One final photo as I have a bit of a thing for seeing things stacked up or all together and this one pleases me lots!

Stampin_Up

Much kitchen activity to go and do now, I joined fat club this week so have to stick to the food plan! Wish me luck.

Hugs
Pin It
Thursday, 28 March 2013

Stampin' Up! Pop Up Posies Does Easter

We still have snow in Nottingham - how about you? Still the Mini Beasts break up from school and nursery today and Zac asked me to make some gifts for their teachers. So I did:

Stampin_Up

I got these cute bunny chocolate lollipops from Thornton's and somehow the little lemonade chocolate bubbles fell into my basket too. Zac and I enjoyed tasting a few of them - well you have to make sure the popping candy works eh?

Stampin_Up

The box lids and bases have been made using the embossed labels out of the Stampin' Up! Pop Up Posies Kit - it's in the Spring / Summer Seasonal Catalogue. So easy to make, just score from the pointy corners and fold. I've used Window Sheets to make the box and backed with So Saffron Designer Paper from the Subtles Stack. I sat the bunnies in one of the mini paper cases, also included in the kit.

Stampin_Up

The sentiment is from Delightful Dozen, I don't really have need for a specific Easter stamp set so this is fab as it has 12 different occasion sentiments in. The Calypso Coral and Pool Party flowers are held together by the beautiful fabric covered brads. These pieces all come in the kit so no die cutting or punching needed!

Stampin_Up

The teachers all loved them and the cards Zac made them too - I didn't get chance to photograph them which is a shame, they were all made using retired stickers etc from Stampin' Up! Simply Scrappin' Kits.

Here's to a chocolate filled weekend!

Hugs
Pin It

Wednesday, 27 March 2013

Stampin' Up! Artisan Embellishments Class

If you follow me on Facebook you'll have seen the sneak peek I posted yesterday of this project. I absolutely love this and it's something a bit different for me too. We decorated our hallway and stairs before Christmas and I have been looking everywhere for some 'art' to pop in a particular place and have found nothing that fitted the idea I had in my head. So I set about creating my own. I've done one so far and have another to make to go with it. Here you go, starting with the sneak peek I shared already:

Stampin_Up

Ta-da ....here is the whole thing.  It's not the brightest of photos but it's so dark here with more snow falling! It's a print tray box (12" square) decorating using the Artisan Embellishments Kit and More Amore Designer Speciality Papers amongst other things.

Stampin_Up

I've wanted to do something with this photo of the Spark and Major Mayhem for so long now. Zac was such a chunky baby boy! I was so nervous about cutting the photo as the digital of the original is long since lost on a burnt out laptop! 

Here's a close up of one of the resin flowers:

Stampin_Up

And a bit more detail too:

Stampin_Up

 If you like this and would like to make your own, I'm running a class doing just that on:
Saturday 18th May
1pm - 4pm
Nottingham

Cost is £30 and includes the frame (rrp £22.50), all your kit including adhesive and refreshments.
Please book ASAP as spaces are very limited.
You can secure your place with a £10 deposit but payment in full needed by Tues 30th April please.

To book your place, you can email me at
bluejellystampin@sky.com
or phone me on
07748 707845

Hugs
Pin It
Friday, 15 March 2013

Stampin' Up! Madison Avenue meets Razzleberry Splash

Mmm bliss, Major Mayhem is feeling much better and has been snuggled up on the Sofa watching Star Wars this morning, allowing me to escape to the Room of Craft for a while and create. And create I have:


So I made this gift box and card set. The boxes are Kraft and come flat in a packet of four for just £2.75 and there are so many different ways to decorate them. I love them to bits and could make one a day if I had an endless supply! I've used Rich Razzleberry, Crumb Cake, Silver Glimmer Card and Pool Party. I am going to be so sad to see Pool Party retire in a few months so expect to see me using lots of it in the meantime!

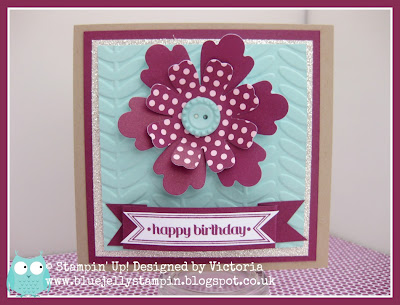
The card is 4" square and I've layered up the card and Silver Glimer Paper. TIP: to stick layers onto the Silver Glimmer Paper, I punch holes or shapes in it to use on different projects and pop the glue in the space punched out! I've used the Sale-A-Bration Vine Street Embossing Folder on the Pool Party card.
  
Stampin_Up

The flower is made with card stock stickers from the Stampin' Up! Razzleberry Splash Simply Scrappin' Kit - you'll be seeing a lot more of that kit from me very soon too! I've added one of the Pool Party Buttons (FREE with an order of £45 or more in the next 8 days!)
 
Stampin_Up

The sentiment is from Itty Bitty Banners - also FREE during Stampin' Up! Sale-A-Bration promotion and you can also buy the matching Framelit Dies too. I've simply cut them out and done a spot of folding to create a bit of lift!

Finally the box:

Stampin_Up

Decorated in the same way with a tag made using Pool Party Ribbon and some more flowers from the Razzleberry Splash Kit. The flowers around the sides of the box are stamped from Madison Avenue in Rich Razzleberry, cut out and stuck down.

Keeping my fingers crossed the Spark doesn't have to work tomorrow so I can smuggle in more crafting and then I have Sarah's Stampin' Up! party to look forward too tomorrow night - yey!

Hugs
Pin It

Thursday, 8 November 2012

Stampin' Up! Floral District Project Ideas

Oh dear - I can't get in the room of craft yet again today. Both boys are home today and tomorrow as poor Zac has an upset tummy and has to stay off for 48 hours. He had a very rough night but is very much on the mend today. 

So whilst I haven't been able to smuggle in a spot of crafting I do have some previously made projects that I haven't shared with you just yet and here they are. All created using Stampin' Up! Floral District Product Suite.

Stampin_Up_Demonstrator

My first project is a decorated tin with pencils in. It started out life as a baked bean tin and after a good wash and dry I covered the outside and the inside with Floral District Designer papers stuck in place with Tombow. I wrapped another layer around the outside and then stamped letters using Letter It alphabet stamp set on Whisper White card in matching inks, cut them out and stuck down adding Self Adhesive Rhinestones between to finish. It actually reads 'stuff' but I couldn't get a photo to show it. The pencils are wrapped in DSP too with 1/4" Stitched Grosgrain Ribbon in Rich Razzleberry and Daffodil Delight around the tips.
 
Stampin_Up_Demonstrator

Next up is a money tin. Again I've decorated it with Floral District Designer Papers and the same ribbon as before. This time I've added a flower made using Fun Flowers Big Shot die and matching card stock too.
 
Stampin_Up_Demonstrator

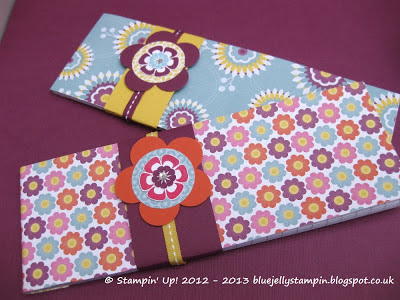
The next projects are really simple to do. Just decorate a note pad cover and make a band to hold it together with a flower added on top of the ribbon. I've used the same ribbon in Daffodil Delight here.

Stampin_Up_Demonstrator

Finally in the same style a Sticky Note holder and pen. I've used Betsy's Blossoms stamp set here - one I got for free in a bundle from Stampin' Up - one of the perks of being a Stampin' Up! demonstrator. Why not drop me an email at bluejellystampin@sky.com to find out more about joining my team and becoming a demonstrator yourself? Great to make some extra cash just in time for Christmas too.

Stampin_Up_Demonstrator

Well I had better get back to Major Mayhem and Commander Chaos, it's amazing how quickly them become noisy when I'm not paying them enough attention.

Hugs
Pin It

Wednesday, 7 November 2012

Stampin' Up! Christmas Holiday Wreath

So exciting, the decorator is almost finished in the hallway and landing. So fingers crossed tonight we can have a good tidy up and put everything back where it should be. Then all we have to do is get the new doors fitted and it will be finished. 

Can't get into the room of craft today, imagine my horror last night when I went upstairs and the decorator had leant his ladders against my desk, popped his newspaper and wallpaper paste brush ON my chair and left bits and bobs of wallpaper over my work top - on top of work in progress and - here's the bit that made my heart stop, piled up all his dust sheets on my floor and on top of my bags and totes. The air was blue I can tell you. We've had words this morning!!

So as I can't create today I'm sharing with you something I made a while back for myself. It's a Christmas Holiday Wreath made using Stampin' Up! Designer paper stacks.

Stampin_Up_Demonstrator

I'd seen so many of these in  real life and blogland and had to have a go myself, this one is in Melon Mambo, Perfect Plum and Pool Party. I know these colours aren't very festive to most but I want this one in my kitchen as that's the only room in the house where I have my beloved pink adorning the place!
 
Stampin_Up_Demonstrator

They are so much fun to make it's unbelievable - very therapeutic and pleasing when finished. I actually ended up making 15 of them!! Not all for me of course. I'm umming and aahing as to do this one in a class or not - let me know what you think. Would you like to make one?

Hugs
Pin It

Sunday, 4 November 2012

Stampin' Up! Floral District Lamp and Flowers

Blimey it's cold today. We celebrated Bonfire Night last night with the boys as James has a badminton match tonight and all the organised displays are too late for a school night tomorrow. So Spark came home armed with a box of whizz pops and the mini beasts loved watching them go up. Although Zac did give us strict instructions that all fireworks had to be attached to a piece of wood and children must stand behind the tape! Obviously been learning about bonfire night safety at school.

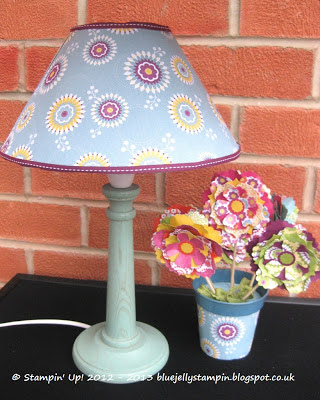
I'm sharing with you some projects made using the Floral District Designer Papers today. Nice warm colours to chase away the cold weather. It's a lamp shade and a pot of flowers. I got the lamp at a charity shop for £1.50, the original shade was pleated cream plastic, covered in dust and stains - yuk!

Stampin_Up_Demonstrator

The flower pot was already mine, what a perfect colour! I made a template by rolling it on a piece of brown paper (I get a lot of packaging paper as a Stampin' Up! demonstrator) and then drew around it onto the Floral District Designer Paper and stuck it in place with Tombow.

Stampin_Up_Demonstrator

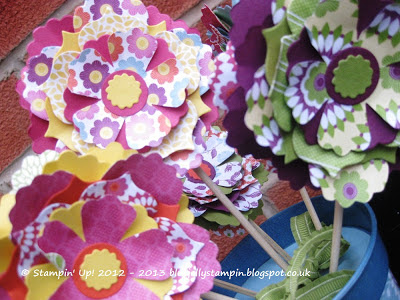
The flowers have all been die cut using the Fun Flowers Bigz Die in the papers and matching card stock. I stuck them to wooden skewers using a hot glue gun and popped them in the pot using a circle of card with holes pierced in it. No need to weight it down.

Stampin_Up_Demonstrator

I made the lamp shade in a similar way. Laid out some brown packaging paper. Then I took great pleasure in ripping off the original shade leaving a blank wire base to work with. Again I rolled it on the brown paper and drew around it to create my template. The template was too big for one sheet of 12"x12" paper so I had to line it up across two. Next I covered the wire frame with Sticky Strip and then carefully rolled the frame with Floral District Designer Paper. To finish I stuck 1/4" Stitched Grosgrain Ribbon in Rich Razzleberry around the top and bottom edges.

Stampin_Up_Demonstrator

I actually quite like this but I won't tell you what The Spark had to say about it as it's not at all printable. Once he realised it was only for my Stampin' Up! displays he changed his tune and informed me 'it's technically brilliant'. Hmmm. I won't be popping a light bulb in here though as I'm not sure using Stampin' Up! paper alone would be fireproof!

Hugs
Pin It

Wednesday, 31 October 2012

Stampin' Up! Christmas Holiday Planner Tutorial

Wow so many requests for this tutorial before I'd even finished it - thank you so much. The tutorial is now available in my right hand side bar. I have of course made one for myself now too:

So my Christmas Holiday Planner is made using elements from the Merry Moments Simply Scrappin' Kit which can be found in the Seasonal Catalogue.

Stampin_Up_Demonstrator

The colours are Old Olive, Cherry Cobbler and Basic Grey. I feel like I cheated Stampin' Up! a little here as the only stamping I have done is the sentiment on the front cover label. Mind you - the Simply Scrappin' kits are so versatile they allow you to get away with it.

Stampin_Up_Demonstrator

A view showing you how many pages are inside.

Stampin_Up_Demonstrator

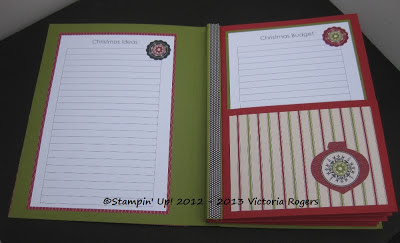
And here shown with some of the inserts taken out. The tutorial includes printable inserts so you don't have to worry about creating your own.
 
Stampin_Up_Demonstrator

The Christmas planner opens out completely flat so the pages don't get damaged.
 
Stampin_Up_Demonstrator

I decorated my pages simply with Designer Papers and elements from the kit like this bauble.
 
Stampin_Up_Demonstrator

I'd love to see yours when you make one so please send me a link or a photo.

Hugs
Pin It