Pages

Sunday 31 January 2016

Layouts using Vintage Bliss Simple Stories

Cor it's a perfect day to be indoors. Brrrr.

I thought I'd share with you some more of the layouts I put together over the Christmas break. Hubby bought me this amazing Simple Stories Kit - Vintage Bliss. I may have to invest in the digital version so that I never run out as I LOVE it.

The first page shows Blake with his 'girlfriend' and future wife Sophia. They are so funny together, only aged 6 and always saying they will get married. I actually bet they don't but it would be so cute if they did...eventually!

I used Stampin' Up! Crumb Cake card for my base and added half of a page from the kit then added embellishment stickers from the kit too. Such hard work...not!

Simple_Stories_Project_Life_Layout_Vintage_Bliss

Here's the opposite side using Project Life pocket page and the same kit. I did take a photo of them side by side but no matter how I rotate and save it - on here it shows as sideways. I shall chalk it up to a 'moment'!

Simple_Stories_Project_Life_Layout_Vintage_Bliss

Next up the same party and the same kit. Kids going mad at the pinata. 

Simple_Stories_Project_Life_Layout_Vintage_Bliss

I like continuity so although it's the start of a new week, I wanted to use the same kit. I think it works OK.

Simple_Stories_Project_Life_Layout_Vintage_Bliss

Here they are side by side:

Simple_Stories_Project_Life_Layout_Vintage_Bliss

If you want to visit my friend Louise at Stampin' Delight please pop over - I get my Stampin' Up! supplies from her. 

In fact, I get to see her tomorrow - yay, something to make Monday fun!

Have fun
Victoria
xxx


Pin It

Friday 29 January 2016

No, you're not dreaming my blog is changing - please ignore current blips and carry on as if they are not there!
Pin It

What have I Bin up to?

Fabric_Pop_Up_Bins

Hello!
Cor what a week. I'm a TV star now you know! 
No; I'm not really but I was on the telly this week but more about that another time.

Pardon the deliberate typo in the post title. Just me effortlessly failing to show my funny side.

I have however 'bin' making loads of fabric pop up bin /desk tidies recently and thought I'd share some of them here with you as well as a few of them in use with their new owners. 

Here are a pair with funky tree design on:

Fabric_Pop_Up_Bins

Loving these blue polka dot ones:

Fabric_Pop_Up_Bins

In Ditsy pink:

Fabric_Pop_Up_Bins

Grey and pink fabulous floral:

Fabric_Pop_Up_Bins

Seeing stars:

Fabric_Pop_Up_Bins

Here are some I made a while back in place in Fiona's Craft Studio. How awesome is her craft space? jealous much!

Fabric_Pop_Up_Bins
 
you can see Fiona's blog HERE

This next one makes me giggle every time I look at it, ladies at a crop wearing their bins as hats!

pop_up_fabric_bins

If you'd like to order one, please pop over to my FACEBOOK PAGE and let me know what fabrics, styles and colours you like.

Victoria
xxx

Pin It

Sunday 24 January 2016

Project Life Layouts for School

See I told you I loads of stuff to share with you, I'm on a mission to catch up. So whilst Hubby has taken the Mini Beasts swimming (mwah ha ha!) I thought I'd sneak a post in.

Project_Life_Simple_Stories_Smarty_Pants
This goes back to July last year - gulp. Thankfully I've caught up a bit and am currently creating layouts for August in tandem with starting this year. Anyway, I got lots of year end photos of the Mini Beasts and their friends at school and also their official class photographs. Now we bought these because we decided it would be nice for the boys to look back at in the years to come and remember their friends. The plan was to pop them in frames on their bedroom wall. But then the photos came and were 20" wide and quite narrow. What to do with them?

Much time later I took the brave decision to scrapbook them without destroying any small children!

First though here is the last day at infant school for Zac and last day in his class for Blake:

Project_Life_Simple_Stories_Smarty_Pants

I used the Smarty Pants collection kit from Simple Stories for these. I LOVE their kits as I like to do a mash-up of pocket style pages and 12 x 12 layouts too and the kits make it so easy. All I had to do on the layout above was add photos and journalling, everything else was done for me!

here it is below teamed up with it's opposite page. I had to include a photo of Zac on his first day ever at the school as well as his last to see how much he has changed. Aw, my baby is all grown up!

Project_Life_Simple_Stories_Smarty_Pants

Here is Zac's class photo. You can see I managed to cut the photo without chopping off anyone's head. I'm quite proud of that! I've added a few other bits and pieces to the page, no idea where the die cut word is from but I like it. I downloaded the school logo and used my Stampin' Up! circles dies to cut it to size. Oh, the 12 x 12 base card on these is Crumb Cake from Stampin' Up!

Project_Life_Simple_Stories_Smarty_Pants

Finally Blake's class photo. Apologies for the hidden faces but some children aren't to be shared on social media etc. Again it's all the kit from Simple Stories with a few little additions from me

Project_Life_Simple_Stories_Smarty_Pants

I'd better dash and crack on with a bit more tidying up before everyone gets back home. I think I'm being let off cooking duties later in exchange for a pub tea. I'm starting to suspect the only reason is it's Hubby's turn to do the food shop!

Back soon
Victoria
xxx
Pin It

Saturday 23 January 2016

Thank You Cards from the Boys

Do you know I did try to blog yesterday. I installed the Blogger app on my S6 and tried to blog from my mobile. Unsuccessfully as it wouldn't load up any photos from my phone. Never mind - if you have any ideas on how to blog on Blogger from your android device please let me know.

So this week I realised the Mini beasts hadn't yet sent their thank you messages out and erm, Christmas is a while ago now. SO better late than never right?

With the price of posting cards these days I didn't want to buy the cards too - especially not when I have a craft room and stash to make me own. I didn't have tons of time however and so yet again I opted for the digital version and my trustee printer. 

Want to see?

Thank_You_Cards_Digi_Craft

I had this sheet of robot elements that I got a while back from Sweet Shoppe Designs, great if you are a digi scrapbooker and for Project Life, calendars and all sorts. 
Anyway - all I did was create a 4" x 8" template in MS Word (yes I'm that far behind everyone else in the technological world) and added the image before printing. I've got a stash of pre scored 4" square cards so about time I started to use them up.

Here's a close up:

Thank_You_Cards_Digi_Craft

I thought the image was so appropriate as The Hubby and I spent most of Christmas Day helping the boys to build and assemble their gifts once they'd torn through them like a plague of locusts.

I had this design too:

Thank_You_Cards_Digi_Craft

Luckily we had the foresight to stock up on various types of batteries prior to the Bi Day so we weren't met with tears or tantrums. Not from the kids anyway, maybe from me whilst cooking the Turkey!

Thank_You_Cards_Digi_Craft

My next trick is to get the boys to sit down and write their messages!

Wish me luck
Victoria
xxx
Pin It

Thursday 21 January 2016

Simple Thank You Cards

Ooh I'm feeling all pleased with myself. I've only gone and done a workout DVD today. I know, don't worry you have come to the right blog, it's just I'm trying to get healthy and fit this year as well as be creative and all that. 

Anyway, slight blip in normal service, talking about health and fitness on here indeed!
I'm back in the full crafting swing of things and even got myself a sesh of card making in this week. I know - you're as surprised as I am right? Want to see my pretty creations?

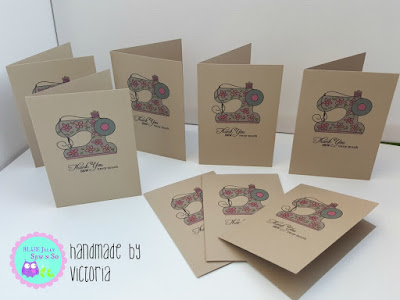
Stampin_Up_Crumb_Cake

They are thank you cards for lovelies who have ordered from my sewing business this week. I think I may make some more as I really like how they turned out.

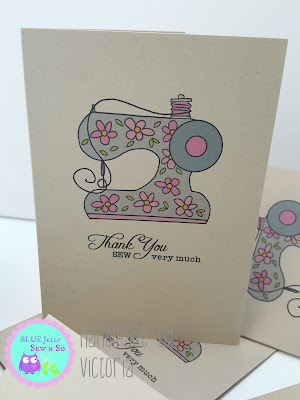
So easy to create too. I used my Stampin' Up! Crumb Cake Note-cards, they come with matching envelopes which is a bonus. The sewing machine image is a digi one I bought ages ago from the lovely Pink Petticoat Boutique. I am so sad they have closed down as her designs were amazing. 

I did cheat and before I printed them  direct to the cards I coloured the image ever so easily in Paint - no posh software needed for me! 
Here's a close up:

Stampin_Up_Crumb_Cake

I'm no tempted to decorate my actual sewing machine to match. How pleasing on the eye would that be?

I get my Stampin' Up! stuff from the lovely Louise over at Stampin' Delight. Why not pop over for a look. I think her latest post uses these notecards too. 

Victoria
xxx
Pin It

Sunday 17 January 2016

Fun and Simple Cards in a Hurry

I am the worlds worst at keeping handmade cards that I need for myself in stock. So I am pleased to have enough stash to hand to whip a few up in a hurry when I need to. And when I say in a hurry I mean like post in 15 minutes!

That's when these Fellas came in very handy:

Simple_Stories_Sn@p_Collection_packs

I got them last year for £3 each pack in our local TK MAXX shop.  Funny thing was I got them home and realised the middle section of cards was missing from the birthday one. Imagine my delight when I returned just after Christmas and found the missing cards some months later! I had a right job explaining it to the staff on the checkout but they took my word for it and let me have them.

Anyway, I digress, here are my cards in a hurry. They are both for two of my nephews Evan and Gil who share the same Birthday, just a day before Zac. Hence me not having any cards ready, I was too busy creating a Minecraft cake and party - more about that another time.

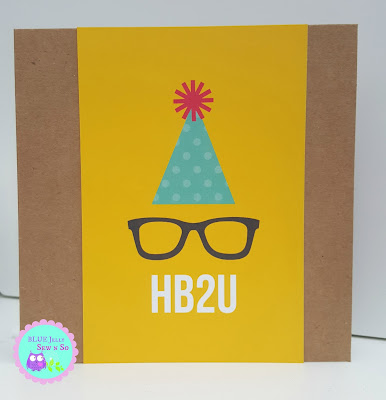
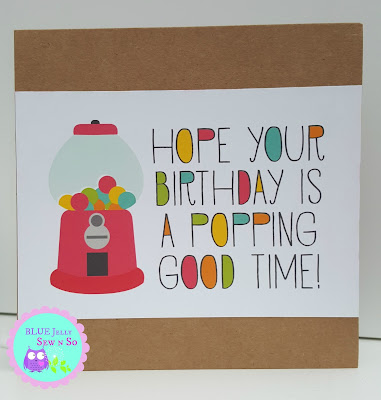
First one. Simple 6x6" Kraft card base with the Journalling card stuck on front.

Project_Life_Birthday_Cards_Simple_Stories_Snap

 And again for the second one.

Project_Life_Birthday_Cards_Simple_Stories_Snap

Both together:
 
Project_Life_Birthday_Cards_Simple_Stories_Snap

I hope my photographs are OK. They are all being taken on my phone at the moment due to slightly tipsy error last year when I ended up popping my SD card from my camera in the wrong slot in the side of the TV for it never to be seen again. Hubby will not let me attempt to take the back of said TV to try and retrieve my card - boo hiss!

Catch you soon
Victoria
xxx

Pin It

Saturday 16 January 2016

Project Life 2016 Header page with Tutorial

Erm...Happy New Year!
Yes I'm a bit late in the day, month even but I'm here and have so much to share with you I might pop.
But I'll break you in gently. Whilst I have not yet finished my 2015 Project Life Album (don't shoot me, I'm in the majority), I have made a start on my 2016 album, being as Santa was kind to me and all and gave me two albums and various kits to play with. Total bonus finding those wrapped and under the tree Christmas Day I can tell you.

Want to see my header page? It's 12x12 and had to be in pinks and sparkles because I am surrounded by boys and boys things and smells and stuff and I just need some pretty in my life:

Project_Life_2016_Header_Page_Tutorial

I can not begin to tell you how long this took me, though judging by today's date I imagine you can hazard a guess. It did not start well. Want to see my first attempt? I wasn't sure of my colour scheme at this point but wanted glimmer and sparkle. I should add it to a Pinterest 'Nailed it' Board!

Project_Life_2016_Header_Page_Tutorial

Ended up reminiscent of a bottle of Rive Gauche perfume (I remember seeing it as a child back in the 70's) and that's not the mental image I wanted each time I opened my album. What you don't remember Rive Gauche? Here, let me burn your retinas with the image too:


With me? So I decided to ditch the blue and gold and that's where my problems began. I don't have a lot of pink craft stuff, I tend to give most of it away to a friend with a daughter. So I grovelled and stole a bit back - we have that sort of friendship, it's all good. 

I really wanted to use the 'Hello' card but I'd already glued it to the gold base after carefully cutting out the lettering from the original journalling card. I'll admit I tried the careful 'attempt to un-glue Tombow' but we all know how that scenario ended up. I spent some time sorting through every item in my craft room to find a similar thing I could use. I can assure you there were more tuts than an episode of Skippy. 70's child again - sorry.

There was nothing!
So follows me making my own:
Found a fabulous scrap of Stampin' Up! Pink Passion card and wrote 'Hello' on it in pencil. My writing isn't perfect but it will have to do. Then I drew in the 'down lines' or whatever you want to call them to create a bit of depth. Grabbing a black pen I drew over the pencil lines and then coloured them in.

Make_your_Own_Project_Life_Cards

Decided it still looked a bit naff and sorted through approximately 7 white gel pens to find one that would write without scratching, drying up or not showing up to find one that actually worked (yes I threw the others in the bin).  Oh I wanted it to add some highlights. Don't look to closely - you can see I have shaky hands.

Make_your_Own_Project_Life_Cards

Then I cut a banner from black card and found some cute little rub ons from Doodlebug Designs and popped my sentiment on. For the more is more look I also added a clear photo sticker from Simple Stories.

One down - many to go. I'll condense!

Make_your_Own_Project_Life_Cards
I found the card with the star and rays in my stash and added a pink sparkly die cut year. Used Stampin' Up! number dies for that. Then I found some Studio Calico rub-ons and decided 'let's do it' would look great. On Pink. Ta-da!

This next one is simple. The card is out of one of my Becky Higgins Core Kits and I'm sorry I have no idea which one as I like to jumble mine up to make my life as difficult as possible. No really.

I downloaded the font from DaFont website.  I just searched under 'script' style to find one I liked and installed it. Next cut a few scraps of copy paper to measure 6"x4" (or to suit your card) and then the painful bit, grab a ruler and measure how far up you want your font. I used MS Word and created a 6x4 document and added a text box and did my first test print. 

It's easy to see if it's in the right place....hold the card up to the window with your copy paper over the top. I could see mine was too low down so made an adjustment, deleted the text box frame and printed again. When I knew it was right I popped my PL card in the printer.

Printing_On_Project_Life_Cards
 

My other cards were made up in the same ways, die cut letters, rub ons, stickers, papers and instead of using photos I edited a couple to look like pencil drawings. I got totally stuck here and a kind lady over on one of the Facebook groups suggested using a picture of our house or something. That led me to the idea of using 'Elm Grove Boys' and 'It's a Rogers thing'. 
Sums my album up!

Hope that was of some use and that I didn't drivel on for too long.

See you soon
Victoria
xxx

Pin It