Pages

Saturday 30 November 2013

Stampin' Up! Undefined Hugs and Tutorial

Woo-hoo I've had sooo much fun this morning carving my own rubber stamps. yesterday I showed you and introduction to Stampin' Up! brand new product Undefined Stamp Carving Kit

I studied textiles at University and prior to that I did one of my A-levels in printmaking and specialised in lino cutting so I was proper itching to have a go at the Undefined Kit from Stampin' Up!. But then I got stuck - what should I carve? My first thought unsurprisingly was to design my own Blue Jelly Bean image. But then I figured Stampin' Up! had done a jelly bean image in the past that I've already used. So I looked around for inspiration and do you know it was right in front of me:

My gorgeous boys having a cuddle. So here's how I got creating:

Stampin_Up_UK

I grabbed a photo of Zac and Blake I took earlier this week and then started sketching on my small shopping pad in pencil. I knew I couldn't re-create the photo so it would need to be something representing it instead. I got it how I wanted on my first attempt. So next I flipped the image over and rubbed it onto the rubber to transfer the image - back to front, then drew over it using the Island Indigo Marker that comes in the kit.

Then it's time to carve and trust me the slower and more gently you do this the better. If you struggle a bit with dexterity, you can gently warm the rubber with a hairdryer as you go along - wouldn't recommend using your heat tool for this though! I do the outside edges first, then the inside and finally the outer edge - it keeps the image stable as you cut if you leave the outside until last.

Stampin_Up_Demonstrator

Cut your image out and stick to the foam mount included in the kit and before you stick it to a wooden block, stamp it in Stazon onto the block.

So I made three stamps in total (so far). Want to see what I made with them?

Stampin_Up_Nottingham

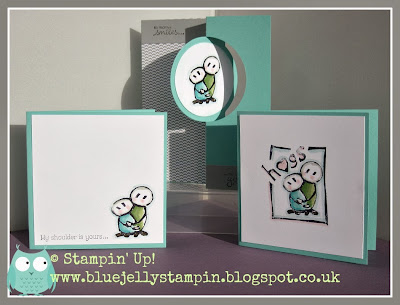
A set of three cards. I wanted to keep them simple so that the focus is on the image. Here's the first one I made:

Stampin_Up_UK

I stamped the images onto Whisper White using Stazon and then coloured with Markers then popped onto a Coastal Cabana Card base.

Next I decided to go really clean:

Stampin_Up

Just the image of the boys hugging in the corner and a sentiment from Gifts of Kindness.

Finally a card using the Circle Card Thinlits Dies:

Stampin_Up

This time I've used some Smokey Slate Designer Paper and sentiments from Petite Pairs. Hmm I think I need to get busy and order some re-fills, I can see this being addictive!

I've you'd like to order Undefined, please drop me an email at:

bluejellystampin@sky.com
or order on line

Hugs
Victoria
x
Pin It
Friday 29 November 2013

Stampin' Up! Undefined

Oooh what's this - another NEW product from Stampin' Up!

Stampin_Up_UK

Here it is - the Stampin' Up! Undefined kit. Ever wanted to design and cut your own rubber stamps? Well now you can. My kit is due today and I can't wait to get it and have a go tomorrow. For now I thought I'd share a photo of some of the creations made by fellow demonstrators at our recent Stampin' Up! European Convention:

Stampin_Up_UK

Want to see how it works? Watch this video:


Back tomorrow with whatever I manage to create with my kit!

Hugs
Victoria
x
Pin It

Thursday 28 November 2013

Stampin' Up! Magic Reindeer Food Video Tutorial

Aaaargh, I've spent ages today whilst the boys returned to school recording my very first My Digital Studio Tutorial. The recording bit was a breeze but when it came to the editing and producing I have a lot to learn! 

So at Stampin' Up! European convention it's kind of tradition to take along a few swaps with you to exchange projects with other demonstrators to help you come away even more inspired. So I made these:

Stampin_Up

Tube upon tube of Magic Reindeer Food. In return I got some beautiful swaps which I will share with you tomorrow. For now I'm going to share how to create these, you need to get a supply of plastic test tubes first! Then fill with a mix of oats and Stampin' Up! glitter - I used Dazzling Diamonds.

And here is how to create the reindeer labels:


I printed my labels directly on to Crumb Cake Card and punched out with the 1 3/8" Circle Punch:

Stampin_Up

Here's close up of the wording which I also created in My Digital Studio, printed on Crumb Cake Card again and cut into banner. All attached with some Linen Thread and little jingle bells I found on the Internet.

Stampin_Up

Hope you enjoy
Hugs
Victoria
x


Pin It

Wednesday 27 November 2013

Stampin' Up! European Convention 2013

Wow - what an amazing few days in Manchester I've just had at Stampin' Up! European Convention. I was chuffed to bits to spend time with so many of my fellow teamies and to meet two of them for the first time too!! I met old friends and new friends, learnt loads, came away so inspired that I've actually had a good old tidy up in the room of craft. I've got more project ideas going on inside my head than you can shake a stick at!

So do you wanna see some photos? You do? Good - I've condensed them into collages or this would end up being the longest post I've ever written:

Firstly there's a shot of Louise my down line and roomie - my goodness we laughed - this is us at the Silver 2 Reception. Next most of the Stampin' Stars team with Natalie doing her bestest star impression, then the recognition booth, Karen, me and Louise then me and the lovely Jo.

Stampin_Up_Nottingham

Some of the gorgeous stuff we were given. Firstly the fabulous presentation folder and pen from the Silver 2 Reception, my beautiful bag tag made by Louise along with my very own bag charm, it's not Stampin' Up! but if you'd like one drop me a message or an email to order one! My recognition badges etc and this years convention back pack.

Stampin_Up_Demonstrator

Have to share some gifts. Starting with my roomie gift from Louise - with hand stamped slate coasters inside, let's say not all the coffee made it home - well they do say every things premiere but the price but there was a SERIOUS lack of coffee in our room! My pretty gift packaging and lovely gift from my up line Kim and finally my beautiful hanging wall decoration from my lovely friend Cal.

Stampin_Up_Nottingham

Here some fun - Sarah and Karen, Stampin' Up! staff, Louise and her enormous cupcake, Jane, Helen and Nic and the oh so pretty iced flower light table decoration from the Silver 2 Reception.

Stampin_Up_UK

Next up my cute gift from Natalie, Louise and others in the recognition booth, Paula Gorry in her 'comfy' shoes, Louise winning on prize patrol, Sara Douglass (Shelli's daughter), Pam Morgan oh and Louise again!


Oh a really bad selfie of Louise and I, my proudest moment watching Louise presenting her workshop wow on stage, Helen and Nic clapping as we awaited an all attendee giveaway (one of many!), Zoe being Zoe!, Pam Morgan on stage and the lovely Cal doing her thing with her Demonstrator booth.

Stampin_Up_Demonstrator

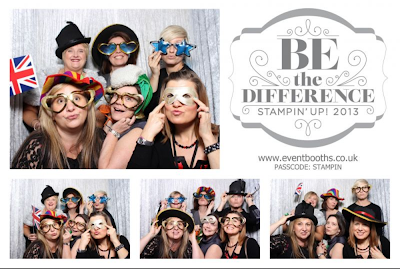
Finishing off with my favourite pic of the weekend - there was a party photo booth at the 25 year celebration party after awards night and we managed to grab Sara Douglass to come in and be sensible with us:

Stampin_Up_Nottingham

The next three years Stampin' Up! Convention will be held in Brussels - how exciting is that? If you'd like to join my team and come along to the next one, drop me an email at:
bluejellystampin@sky.com

Hugs
Victoria
x
Pin It
Tuesday 26 November 2013

Stampin' Up! Holiday Planners

Just to bring back to the top both of my Christmas Planners are available in my right side bar as instant download PDF tutorials..... Here is the latest design:

Stampin_Up_Nottingham
Stampin_Up_Demonstrator

Stampin_Up_UK

And the previous but very popular design:

Stampin_Up_Nottingham

Stampin_Up_UK

Stampin_Up_Demonstrator

Hugs
Victoria
x
Pin It

Stampin' Up! Color Me Christmas Set

Waaaah long time no blog - let's just say a combination of builders, family stuff and then going away to Stampin' Up! European Convention has kept me occupied! Still here I am and shortly I'll be sharing with you the excitement of Stampin' Up! Convention and share a little about the next one too!

But for today I'm showcasing a simple set of cards I've made using Color Me Christmas stamp set.

Stampin_Up_Nottingham

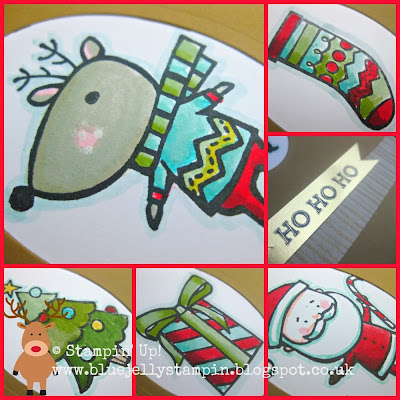
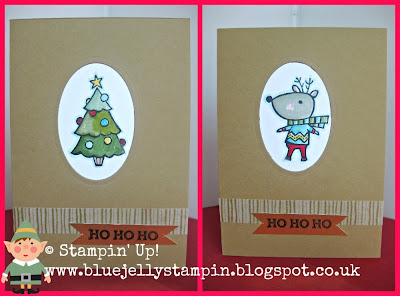
I've used the lush Baked Brown Sugar card for my base and cut an oval using Framelits. Behind each aperture is an image from the set stamped in Stazon and coloured with Stampin' Up! Markers:

Stampin_Up_Nottingham

Before my days as a Stampin' Up! Demonstrator (4 years now!) I used to absolutely love colouring in stamped images and the different mediums to do so. I never thought I'd be happy to use my Markers but I find myself very content with the results these days! That and I've finally caved and invested in some decent glasses so I can see what I'm doing!

Here are the cards themselves:

Stampin_Up_Nottingham

Can you spot a NEW product on these? Or maybe on these?

Stampin_Up_Nottingham

Wa-ha-haaaa, it's the lush Gold Washi Tape, one of many fabulous product gifts lavished on us by Stampin' Up! at Convention - I'll share more tomorrow.

Links to products in my shop if you'd like to fill your boots and get yourself some early Christmas treats:

Pin It