Pages

Friday, 22 April 2011

Destroy It Yourself

Aah Easter weekend, otherwise known as Destroy It Yourself weekend where all the DIY shops are full of those off work for the long weekend with nothing else to do except attempt those dreaded tasks about the home. We're no exception! But before I share our days work, I'd better show you my project for the day:


I've had a little play with the Sew Lovely stamp set and coordinating Sweet Stitches papers. Great fun. The patterned paper already has the stitching on it to save me a job! I stamped the tape measure on to some Pretty In Pink Grosgrain Ribbon and added a folded punched oval and a jumbo eyelet to the end. The other images have been stamped and paper pieced with the DSP and stuck down with dimensionals. Of course I had to use self adhesive pearls for the tops of the pins!

Now for the destroy it yourself job. Our garden isn't very practical for the boys to play out in because the back gates broke some time ago and we haven't had time to do anything abou it. Now though we're putting up a new fence and a gate. When I say 'we' I do of course mean 'he' with me just observing and providing the occassional brew to keep him going. I've been far too busy having water fights with the babies!
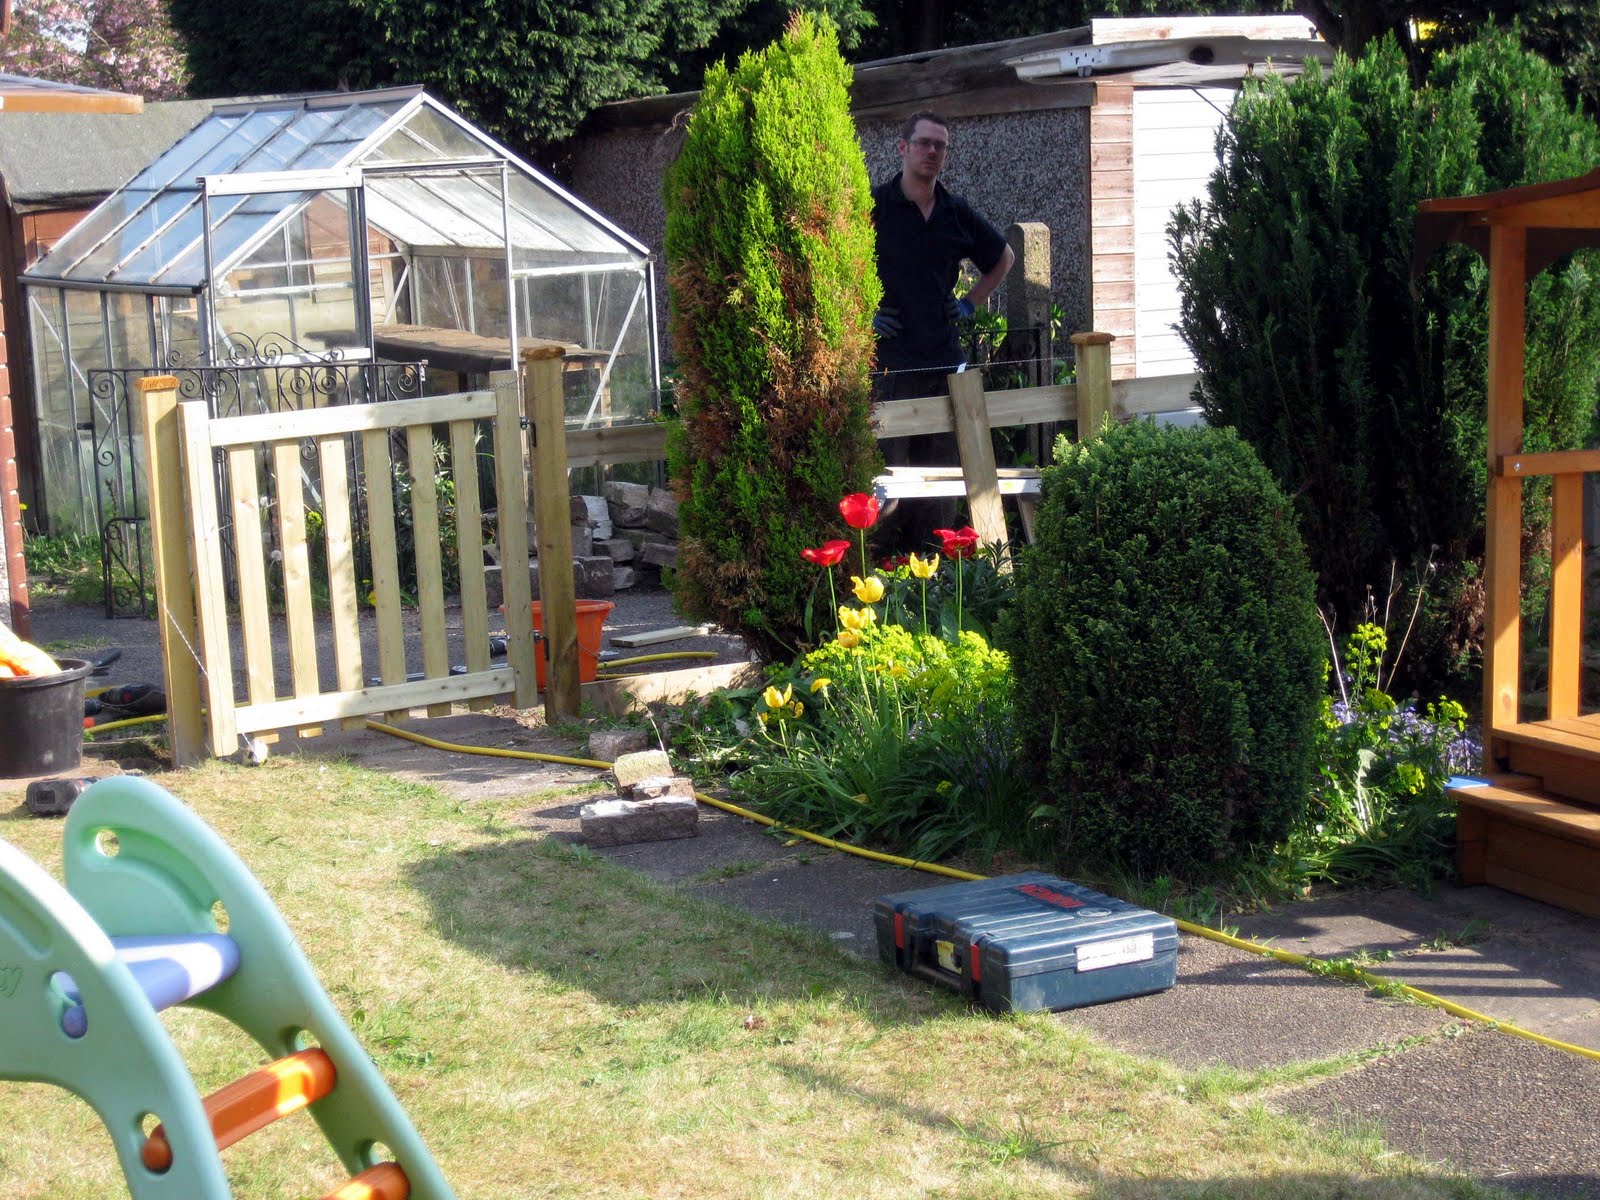

The fence and gate are partway down the garden as we don't want the boys to go beyond this point whilst they're little. We plan at some point to dig a veg patch in the other half of the garden but that's not going to happen this year as I think we'll need to hire a bob kat and a skip first to clear the land!

Enjoy the sun if you have it too.
Hugs
Pin It

Thursday, 21 April 2011

Nearly forgot

Oooh time's running away with me today, I almost forgot to blog I've been so busy. I've made another card using mainly the Big Shot but I did manage to sneak in a little stamping too:


It's a Crumb Cake base witha  layer of River Rock embossed with the Perfect Polka Dots folder. Then some Very Vanilla card with a punched scallop trim border layered with some Springtime Vintage DSP. My flower is made from the Fun Flowers die using Baja Breeze, Very Vanilla and River Rock card and a layer of the DSP too. The Big Button is also Springtime Vintage.

I stamped the little sentiment from Tiny Tags and used the Jewellery Tag punch and attached with a little linen thread.

I love the sunshine  - it makes taking photos so much easier, I didn't even have to use my light box for this, just plonked it on the patio table.

Don't forget my Big Shot Bundle offer on until the end of May - you can see details at the top of my blog.

Hugs
Pin It

Wednesday, 20 April 2011

Easter Card

My Mum in law asked me for an Easter card yesterday so I had to make something super quick as I spent most of the day yesterday spring cleaning! This is very similar to the one we made at Jules' training the other week:


I've used So Saffron card layered with Very Vanilla that's been run through the Big Shot with the beautiful Manhattan Flower embossing folder. I've stamped the sentiment from Occasional Greetings and wrapped round a bright and cheerful strip of Daffodil Delight Striped Grosgrain Ribbon. It's held in place with a flower brad from the brights selection and finished off with a self adhesive pearl.


Remember I've started my monthly Big Shot club now too so if you'd like to come along to a session, please get in touch.

Hugs
Pin It

Tuesday, 19 April 2011

It's not just for babies!

I absolutely love the Little Additions stamp set in the new mini catalogue. You get 21 stamps in the set which I think is an absolute steal. Plus, it's not just for babies!! My old teamie Liza has set a challenge to use 'lots of layers' over at Cupcake this week. Now - I'm usually the first one to shudder at the thought of lots of layers - but I came up with somethin I like:


I've made this new home card. My base is Shimmery White card which I've chopped off part way down and added a layer of window sheet behind. Then another piece of shimmery white card stuck across the bottom with a layered strip of Springtime Vintage DSP over the top. Do you like the way I've made my 'wallpaper' by using the Vintage Wallpaper embossing folder? Made myself chortle that did!

To make my scene I stamped the furniture and picture using Baja Breeze, Early Espresso and Pear Pizzaz, layering on my card with dimensionals and then another layer of DSP on one of the pictures too! For a little finishing touch I added a self adhesive pearl to the drawer and a little gold elastic thread and another pearl to hang my pictures.

Now it's been a while since I've shared what stunt baby has been up to recently so I thought it was about time I showed you his latest antics. Here he is trying to get into Daddy's van:


Now he may look all out of propertion but that's because he has his big brother's shorts on!! Next stunt baby decided to 'sort out' the 'stuff' in the garage:
But with the attention span of a gnat and having successfully pulled out all Daddy's nice tidy cables, it was time to escape:


Tomorrow should be fun, Fluff and Sweet Cheeks are coming round to play!

Hugs
Pin It

Monday, 18 April 2011

New Big Shot Club

I am loving the sunshine, it makes me feel so happy! I've been having a play this morning with the Big Shot again, this time using the Flower Daisies die attempting to make gerberas!


I've made a ma-hoosive 6" square card and matching gift box using the Pillow Box die. Here's the card:


I've used Melon Mambo, Pink Pirouette and Basic Black card.  Here's the gift box:

 
And a close up of the gorgeous faux gerbera:


I'm enjoying using all the Big Shot products so much that I am starting a monthly Big Shot Club. If you would like to come along it will the at 7.30pm on the second Tuesday of each month, starting on Tuesday 10th May. The club will be held in my home and will cost £10.

In the first club session we'll be creating with the Fun Flowers Die, if you pre-order this die from me when you book your place you can have both the class and the die for £32, saving £6.95.

If you live too far away or can't make the club, I will email you a PDF of the instructions for just £2.50 the day after the session, or get them FREE when you buy the Fun Flowers die from me in May.

On top of all that - if you purchase your Big Shot from me during May - you can come to the class for FREE.

Please contact me now to book your place on:
07748 707845 
or 
bluejellystampin@sky.com.

Hugs
Pin It

Sunday, 17 April 2011

Tea Light Shine Bright

Something else a bit different from me today! I've been playing with the Beveled Windowpanes in the mini and wanted to make something other than a card. I got this idea off an American demo's blog but now I can't find the link. If I can find it I will add it in.

So here is my tea light holder:


I made it to go in my living room which is mainly duck egg blue and brown - close to Baja Breeze and Early Espresso luckily! I took the four largets Beveled Windowpanes from the set and added a little row of floral rub ons along the top line using the Planter Box rubs ons. Next a few self adhesive pearls for that pretty touch and to hold it all together, four bows tied using the gorgeous Baja Breeze Seam Binding Ribbon. Here's another view:


I've used a battery operated tea light as wasn't sure about the windowpanes holding out to the heat of a real flame! Gave me an opportunity to decorate the candle too though with a punched circle of Early Espresso on the top and a strip of the blue floral paper from Springtime Vintage. Considering I didn't think I was a fan of the Springtime Vintage suite I do seem to be using it a lot and need to order more papers and ribbon now!

Hugs


Pin It

Saturday, 16 April 2011

Vintage Window Sheet

Ooh sunshine's back! Hubby has even been in the garden with the boys and was spotted doing a bit of weeding. It's Saturday which means all eager LIMettes await the latest challenge from Chrissie and Mandi at Less is More. This week they've chosen 'Acetate'. Eeeeek! Here's my take:


Now a couple of things I'm not very good at. 1). Keeping acetate clean and scratch free as I use it. 2). Photographing cards with acetate on. So I got out an piece of thick Window Sheet - previously scratched from last attempt to use it some time ago and thought I now have the tools to fix it! So I ran it through the Big Shot using the Vintage Wallpaper Embossing Folder and viola - most of the scratches are now hidden from view. I also like the way it's embossed so deeply too, making the window sheet turn white. Here's another photo to show it up a little better:


After my failure last week to stamp bright pink on to black (after reading all your fab tips and trying them, I have to admit I gave up!), I decided to use this as my colour combo this week to make up for it. I've added a strip of Melon Mambo card with a punched scallop trim border, layered with some Basic Black Grosgrain ribbon. Next I stamped the dotty frame from Four Frames and punched it out with the Decorative Label punch, then inked up the sentiment only on this stamp from Oval All using the Basic Black Marker and stamped away. Then once i'd stuck it all down I went and smudged the ink with my thumb!!


Never mind, these things happen. Thanks for all your comments on my entry last week, sorry I didn't return the visit to most of you, we've had a week plagued by ill health but are all now on the mend again. I'm looking forward to some blog hopping this evening.

Hugs
Pin It

Friday, 15 April 2011

My Very Own Mad Hatter

Here's something a little bit different from the usual projects you see from me:


Yes you've seen me make cupcakes before, but not one this big! It was Zac's last day of term at pre-school today and they had an Easter bonnet parade, I was in such a panic yesterday wondering what to make, wondering how to make a hat base. Didn't realise you could get a basic plain kids bonnet at the supermarket! Here's my finished creation:


It's all Stampin' Up! minus the hat itself, the chicks and the felt flower on the cake top. Oh and the inside frame of the cupcake is a plastic plant pot! I folded Neautrals DSP to wrap around it and secured with some very unboyish pink grosgrain ribbon. Now before you protest, Zac asked for a cake hat! He'd seen some at school with eggs and chicks on and said he didn't want one. I asked him what he did want and he said 'a big chocolate and pink cake Mummy' So I had to oblige of course, how could Mummy say no?

The cake top was the hardest bit, I cut the largest circle I could from the DSP and cut in places to fold in the get the shape. Stapled it together and just plopped it in place in the plant pot. The bunnies are all made from our punches with a little Basic Gray Marker for detail. And here is my very own little Mad Hatter, still in his jammies this morning:


Not the best photo but as good as I could get at 6.30am! Hope the school took some good ones. Now it's two and a half weeks before he goes back, got to find lots to keep him occupied now.

Hugs
Pin It

Thursday, 14 April 2011

Look who's back!!

Sorry I haven't blogged for the last few days, Blake has been unwell and my time has been spent looking after my little fella. He seems a little better today but I'm going to have to re-schedule some classes as need to be home with him this weekend.

Soooo - look who's back!!!


Yes it's the Ornament Punch - it's back available for ordering at £15.50 as of now! And as you can see, an Ornament Punch isn't just for Christmas! I've stamped this little lady using the Delightful Decorations stamp set in Tempting Turquoise and punched her out using the ornament punch. I've used a mixture of punches to create this little fishy in Melon Mambo. The sentiment is masked off from the Level Two Hostess set Long Fellows.

Shame on me - nothing from the mini on this card! But this punch is just so versatile, fish, varses, balloons, rabbits....the possibilities are endless!

Back tomorrow with some Easter creations
Hugs
Pin It

Monday, 11 April 2011

Springtime Vintage Layout

I've been wanting to show you this since Saturday as I made this layout at Jules' training in Leeds. She gave us all some kit to use and we were left to our own devices to design our layout. I couldn't finish mine as I'd run out of printer ink and so couldn't add my photograph! Anyway, finally here it is:


It's a photo of my downline Tracy and my upline Steph taken in November at Stampin' Up! European convention on awards night. So to make my layout I'd been a lot inspired by a chipboard letter Anthea had done on a card and she kindly showed me how she'd done it. I decided I wanted to do something similar and using the On Board Alphabet Chipboard letters was such good fun. They started off life as dull grey chipboard letters and I transformed them to coordinate with the Springtime Vintage papers:


As you can see I've also been playing with the Big Shot dies and embossing folders and of course buttons, ribbons and pearls too!
Ironically Springtime Vintage is the theme for my next scrapbooking class on Tuesday 26th April at 7.30PM. The cost of the class is £10 or £22 including a 12x12 album. If you'd like to come along please contact me to book your place.

I'd like to share the lovely surprise birthday cupcake Jules gave to me and also to Karyn:


And here's Gem struggling to get both our sparklers lit at the same time!


It was the scrummiest cupcake ever - big fudge pieces on the top mmmmm, mmmmm! Thanks Jules!

Hugs
Pin It